Custom Fields
How to get here
Tools menu > Control Centre > Advanced > Custom Fields.
|
|
LabManager allows you to specify your own 'fields' to represent your data. These fields will allow you to cater for custom data within LabManager. For example, for each of your customers you may be interested to record their professional titles, company website, Dental Practice group code or other notes - these are all custom fields that are set up by default - you could alter these to record other information instead, such as Preferred invoicing schedule or salutation.
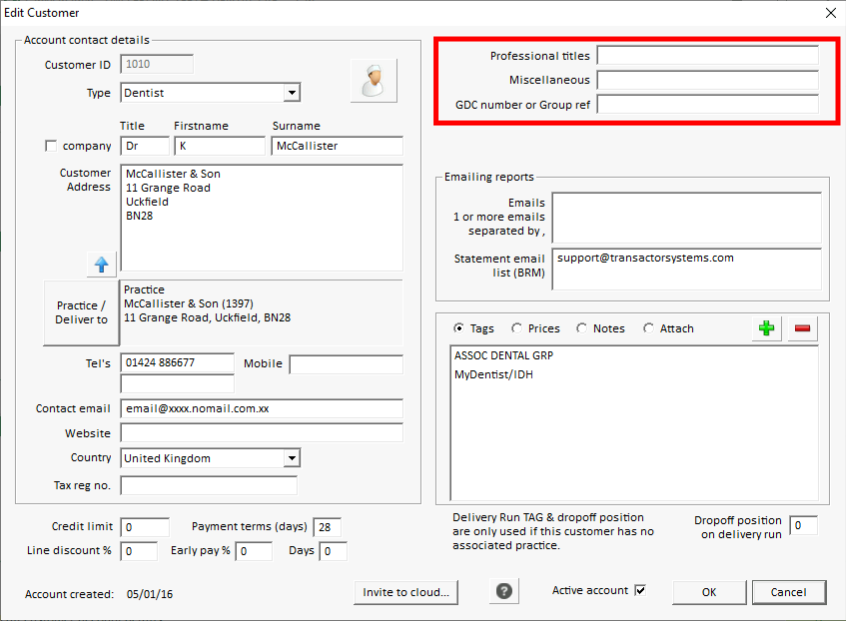
The database can only hold a certain number of custom fields for some tables - a table being the term given to a collection of a specific type of data, such as Customer details, or Users. For example, the Customer table can only support 4 custom fields, you can view these by looking at the details of one of your customers; the custom fields are the last boxes on the column of boxes on the right hand side.
The current user will need to have Advanced or Manager control level to access the Custom Fields page of the Control Centre.

The Customer dialog, showing some Custom Fields
You cannot add new custom fields to LabManager, but you can alter the ones that are already configured. In fact, there are some empty ones available for you to customise as required. If you are planning on altering a custom field though, ensure you are not already making use of it!
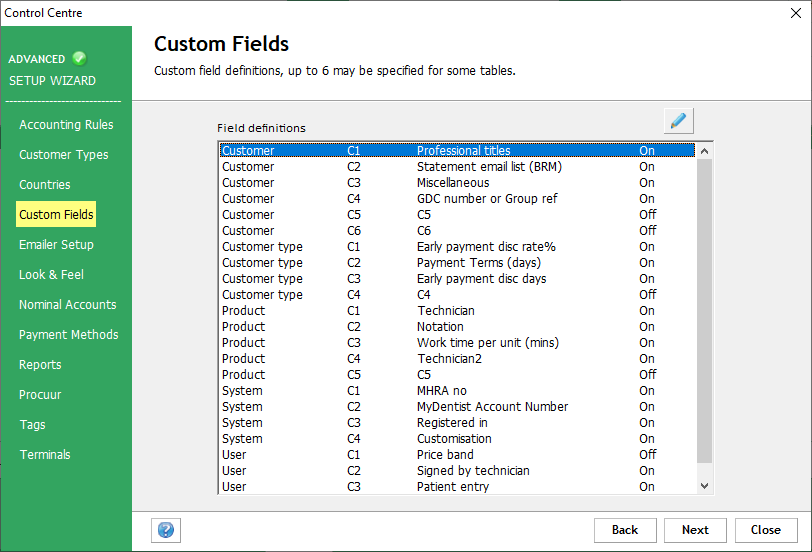
The Custom Fields page is shown below:

![]() Edit a Custom Field
Edit a Custom Field
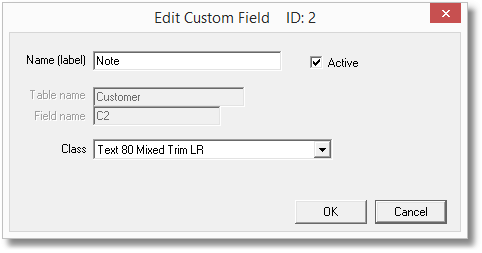
Select the Custom Field in the list that you want to edit, then click the pencil icon. You will see the page shown below:

Edit the fields of this dialog as appropriate. Some properties cannot be changed and are greyed out and used for reference only.
When you've finished editing, either click OK to save your changes, or Cancel to discard them.
Ensure you are not relying on this custom field in its current state before making any changes.
Name (label) is the name of this custom field as it appears on dialogs throughout LabManager. You can change this text but the internal name cannot be changed and will always be the name shown next to Field Name.
Is Active denotes if this custom field is enabled and usable by LabManager. If this box is cleared, the custom field will not appear on any dialog and cannot be used until made active by ticking this box.
All of the below four fields are greyed out and cannot be modified.
Table name (greyed) is the database table that this custom field is stored in.
Field Name (greyed) is the name of this field in the database table.
Is Customer table (greyed) is ticked if the custom field is shown on the Customer dialog.
Is Contact (greyed) is ticked if the custom field is shown on the Contact dialog.
Class is the type of data this field will contain, such as whether the user can freely enter any text in the box, or should they select from a list of items such as Sales Items. You may find it useful to look at other examples of custom fields so you can get an idea of which classes to use. Some classes are listed below:
|
Class |
Description |
Example data |
|
Logical |
The user can select either Yes or No from a list |
Yes, No |
|
Money |
A figure representing an amount of money, using 2 decimal places |
999.99, 0.00 |
|
Month and Year |
The user can select a month and year from a list |
September 2012, May 2010 |
|
Number Integer |
A whole number (no decimal places) |
250, 0 |
|
Sales Item Code |
The user can select from a list of your available Product codes |
PBC, PATIENT |
|
Text 80 Mixed Trim LR |
The user can freely enter text, to a maximum length of 80 characters of a mixture of upper and lower case. "Trim LR" explains that any spaces added to the start or end of the text will be removed. (ie. the Left and Right of the text, so " my text " becomes "my text") |
"Prefers contact via phone", "BDS" |
|
Users |
The user can select any of the Users set up within LabManager |
MANAGER, JANE |