Send to's
How to get here
Tools menu > Control Centre > Setup Wizard > Send To's.
|
|
From this page you can define the available forms of output for your reports and documents. These include printers, email addresses and files.
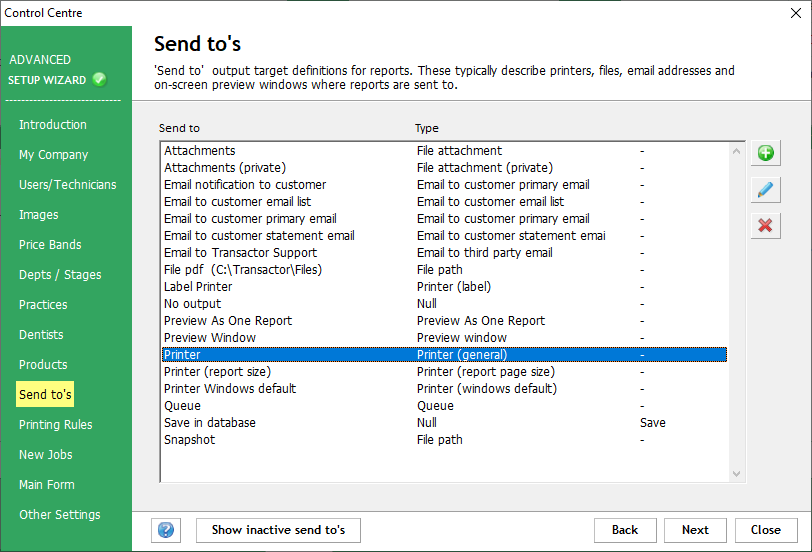
In the list that appears, the "Send To" column lists the output types you have available, and the "Type" column gives the type of output each Send To item is. For example, the "Label Printer" item is a Printer and a "PDF File" output is a file path.
Output Types
|
Attachments |
Send the file to the job's attachments |
|
Attachments (private) |
Send the file to the job's attachments, and mark as private so it cannot be viewed by a client user (dentist, practice) |
|
Email notification to customer |
Send a notification email to the specified email address of the customer. Notification emails contain basic information about the job and are used to inform the customer of a status change - such as the job has been booked in |
|
Email to customer email(s)/email list |
Send to all recipients on the customer's email(s)/email list |
|
Email to customer contact/primary email |
Send to the customer's contact/primary email address |
|
Email to customer statement email |
Send to the customer's statement email address |
|
Email to third party email |
Send to a specified single or multiple email address |
|
File Path |
Send the output directly to a file (such as a PDF) |
|
Label Printer |
Assign your label printer to this channel, so you can send labels to it |
|
No output |
Do not produce any output |
|
Preview as one report |
Show the reports as a single document on the screen, rather than multiple separate reports. Useful for saving the output to a single PDF file |
|
Preview Window |
View the output on your screen, from where you can print or save as PDF |
|
Printer |
Produce a document or report on one of your available printers |
|
Printer (report size) |
Attempt to force the printer to print the document at the size the report has been designed for. For example, if the printer is not correctly using A5 paper for an A5 invoice when sending to the usual printer channel, try sending using this channel to force the paper size. |
|
Printer Windows default |
Produce one or more labels on your available printers |
|
Queue |
Do not produce any output immediately, but queue it for printing later. You can view items in the queue by using the Tools menu > Queues. Usually used for Delivery Notes. |
|
Save in database |
Save the document as raw data in the database, and do not produce a physical copy. May be useful for Transactor Support when diagnosing problems. |
|
Snapshot |
Save a PDF copy of the document in the snapshots folder. By default, this is in your LabManager company1 folder. |
|
|
|
![]() Add a Send To output
Add a Send To output
Click the bubble icon on the icon strip to the right side of the output list.
This will let you create a new Send To channel.
Refer to the page for SendTo (Edit) for help with this.
![]() Edit an Output
Edit an Output
Select the output in the list that you wish to edit, then click the pencil icon in the icon strip to the right of the list. You will be presented with the same box as you receive when adding a new output (see above).
From here you can configure the output, including marking it as inactive.
Refer to the page for SendTo (Edit) for help with this.
![]() Delete / De-activate an Output
Delete / De-activate an Output
Select a row in the list and then click on the red cross to mark it as deleted / inactive.
This is the same as editing the output row and un-ticking "Active". Inactive items are still available if you decide to make them active again later, simply view the Inactive Items (see below), edit the Inactive output row and tick "Active".
View Active or Inactive Outputs
|
To view inactive items, click Show Inactive send to's. |
|
|
To view only active items, click Show active send to's. |
|