How to get here
Tools menu > Control Centre > Advanced > Emailer Setup.
To send emails from Transactor, the Transactor Emailer (or Email Server) first needs to be configured. Once set up correctly, using the settings provided to you by your email provider, Transactor will be able to send emails using your email account.
The Transactor Emailer normally launches automatically with Transactor, and will sit in the background of your Windows environment waiting to send any emails you create in Transactor.
On multi-user network installations of Transactor, the Emailer will only be running on the designated PC, which would usually be the server.
The Transactor Emailer icon may look different depending on the version of Transactor you have, and your version of Windows:
Windows 10 with the Emailer icon from version 7.09 (August 2015)
Windows 8.1 with the Emailer icon from version 7.09 (August 2015)
Windows 7 / Vista with the Emailer icon pre version 7.09
Windows XP with the Emailer icon pre version 7.09
If the Emailer hasn't started automatically visit the Help Desk.
Once emailing has been configured, you will be able to email any printable document by choosing "Email to customer primary email" or "Email to customer email list" instead of Printer or Preview Window, when running any report or job document. You can add email addresses to a customer via the Customer Edit screen.
How to configure the Emailer
You can configure the Emailer from the Control Centre within Transactor. You will find Emailer Setup on the Advanced page. The current user will need to have Advanced control level to access this page.
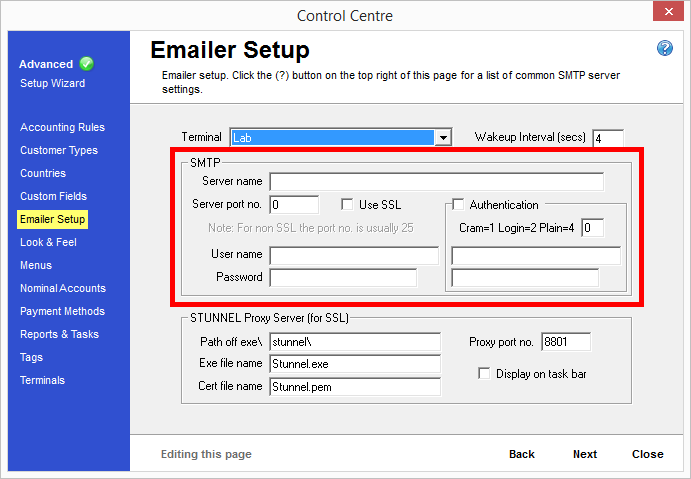
To open the Control Centre, within Transactor choose Tools menu > Control Centre, then move to the Advanced category, then the Emailer Setup page.
![]()
Click on "Edit this page" to unlock the page and enable changes to be made.
| • | You will need to enter the outgoing settings for your email account in the "SMTP" panel (as shown in red on the screenshot above). These settings are provided by your email provider and are specific to your email account. If you do not know your settings, your usual IT support engineer should be able to help, or if you have your email account configured in software such as Outlook, you may be able to manually duplicate the settings from there. |
See the table at the end of this page, as well as our knowledgebase article for some guidance on the settings you need to use here.
| • | If your email provider requires you to use "outgoing authentication" then you will also need to complete the boxes under the "Authentication" checkbox and ensure the checkbox is ticked. |
If you do not need to use "outgoing authentication" you can leave the "Authentication" checkbox empty.
| • | You should not need to alter the "STUNNEL Proxy Server (for SSL)" boxes. |
Click Close when ready and any configuration changes you have made will be saved.
You can now try emailing by either:
| • | Creating a third-party email Send To channel (useful for emailing documents to yourself) |
| • | ...or adding an email address to the customer's details then running a report and sending it to "Email to customer primary email" or "Email to customer email list". |
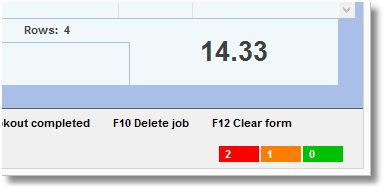
You can check the progress of your sent emails using the coloured boxes on the right of the Action Bar.
See the table below for descriptions of each of the controls on the Emailer Setup page:
Control
|
Description |
Examples |
Terminal |
This is the PC/terminal you are currently on |
Lab / Home / Book-keeper-PC |
SMTP Group |
|
|
Server Name |
The outgoing (smtp) server for your email account |
smtp.mail.yahoo.com |
Server port No |
The outgoing (smtp) server port no for your email account |
465 |
Use SSL |
Tick this if your email account requires Secure Sockets Layer (SSL) |
Ticked (yes) |
User Name |
Your Email account's user name (often your full email address) |
anexamplename@yahoo.co.uk |
Password |
Your Email account's password |
my2difficult2guesspassword |
Authentication Group |
|
|
Authentication |
Tick this if your email account requires SMTP authentication |
unticked |
Cram=1 login=2 plain=4 |
Authentication type (ignore this if Authentication unticked) If Authentication is ticked, this setting should normally be 2. |
this is usually 2 if authentication is ticked |
User Name |
The user name used to authenticate. This is usually the same as your email account user name |
anexamplename@yahoo.co.uk |
Password |
The password used to authenticate. This is usually the same as your email account password |
my2difficult2guesspassword |
|
Authentication settings are only significant if your email provider requires authentication enabled |
|
If you are having problems emailing, you should check this article for some troubleshooting help:
You may also find the following articles from our knowledgebase useful:
Configuring the Transactor Emailer
Send emails to multiple email addresses at the same practice