Start a New Job
|
To start a new job, use the Action Bar and click New Job or use the hotkey (F3).
If you are unable to click New Job, that's because there's stuff going on within the Main Form that LabManager needs you to deal with first. Try clicking Clear Form or finish what you are working on first.
The Main Form is ready with your blank new job...
Assign a Dentist to the job
If you have logged in to LabManager as a dentist, your account details will already show in the top left of the Main Form. If you have logged in as a practice, you may need to choose which dentist to link to this job. Either click on the Dentists button on the toolbar, or you could type part of the dentist's surname in the Dentist box and press Enter. You'll then be shown a list of dentists to choose from which match the text you've entered.
You could also search for a dentist using their ID no.
Great! Now we have a dentist on the Main Form...
Notice how the dentist's invoice address is on the left of the Main Form, and the delivery address (usually a practice) is on the right.
We'll now fill out this job with some job specific items. These items are optional, but more details ensure a quick and smooth process.
Use the TAB key to move the yellow prompt down to PATIENT then press ENTER, or double click on the PATIENT row.
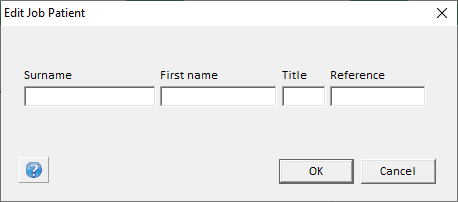
From the box that appears you can enter the patient details.
Using TAB or by clicking and pressing ENTER, use the same method to enter a shade and notation. Accept EstimateThis query is asking if you agree to accept the estimated prices shown on any products you might add to this job, which we'll walk through shortly. It will default to YES. Accept PricingThe estimated prices shown on any products you add to the job may change once the lab has reviewed your pre-order. This query is asking if you agree to accept the pricing that the lab applies to this job once they've reviewed it. It will default to YES. Job DueThe default job due date will appear at the top middle of the Main Form. This date is calculated by the lab's settings for usual turn-around time, current capacity and the days they operate. If you wish to specify a different date, enter it into this row. The lab will review this and change the due date on the job if possible, or they might contact you to discuss further. PrescriptionEnter a description of the requirements for this job. You may also want to attach supporting documentation, scans and photos, which we'll discuss shortly.
Add Product Items to the Job
Optionally you can select the products you want to add to the job. If you do not add products you should ensure you supply an adequate prescription description or supporting attachments so the lab can begin working on the job. If you are creating a TEST job to learn the software, you may wish to avoid adding products to the job, unless the lab is aware you are testing. If you do not add specific products onto the job, you should ensure you add a description in the PRESCRIPTION row, or add attachments to support this. Tab down to (or click) the first empty row below PRESCRIPTION and press Enter. If you cannot see this row, you may need to scroll down using the scrollbar on the far right.
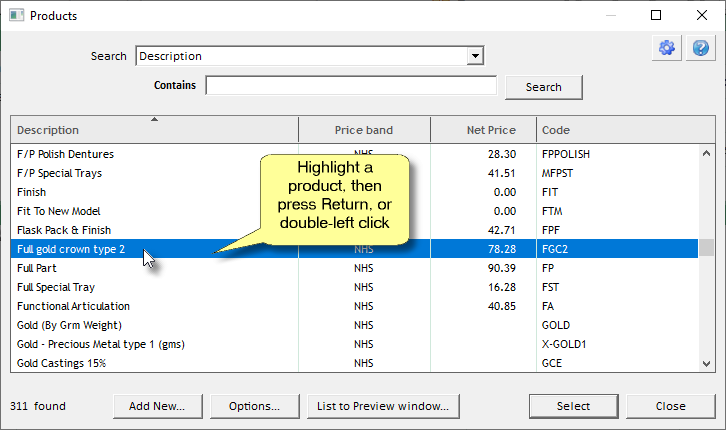
In the Products selection window, click any product you wish to add and press Enter, or double click on the product.
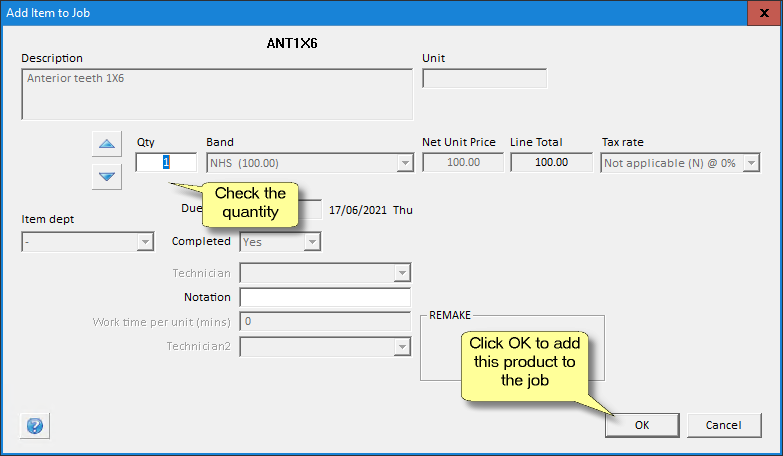
Select the quantity required and check the Net Unit Price.
Click OK when you're finished and the item will be added to the job.
|


