EDI Invoicer
Introduction
A video covering the EDI Invoicer is available below.
The EDI Invoicer will compose group invoices for a given period and selected customer group. The Group Invoice (a csv type file) can be emailed directly from the app and/or opened in a spreadsheet application, such as Microsoft Excel.
The current available invoice formats are listed below, however more formats can be considered for a future update.

Some formats are 'Compact' (one row per job), and some are 'Detailed' (one row per financial lineitem) and some have a format which is specific to an organisation's requirements.
You should have already tagged your customers with an appropriate tag so that they can be included in the CSV invoice.
Let's get stuck in to a walk-through for a common style (MyDentist), then we'll provide a bit of extra info.
Creating a Group summary Invoice
Step 1
Open the EDI Invoicer utility from Tools menu > Apps, or the Add-Ons Menu > EDI Invoicer
...OR
Windows Start Menu > LabManager > EDI Invoicer
![]()
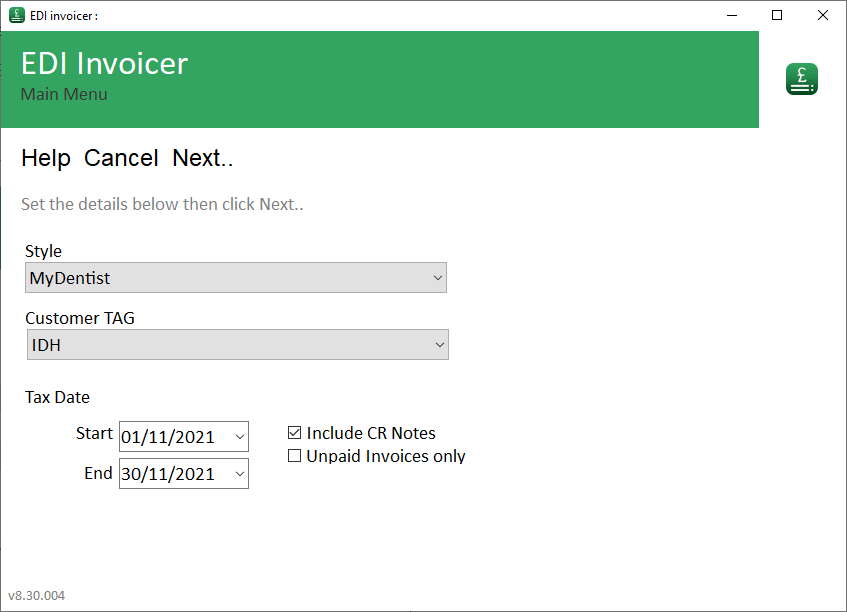
Choose an Invoice Style eg. MyDentist.
Choose a Customer TAG eg. IDH. Any customers that you have tagged with this tag will be included in the invoice you're about to create.
Choose a Start and End Tax Date.
Tick "Include CR Notes" if you wish to include credit notes or not.
Tick "Unpaid Invoices only" if you only want to include invoices that have a balance. ie. they're not fully paid yet.
At the top of the page, click "Next".
Step 2
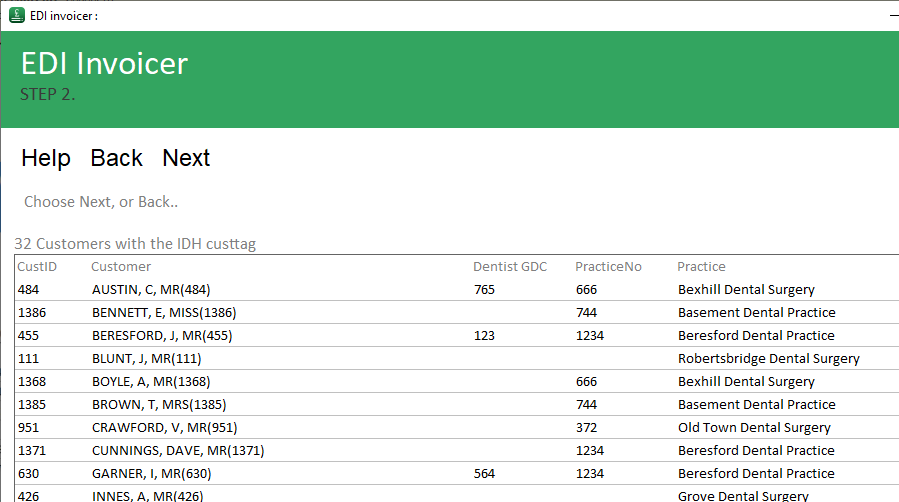
This is the list of Customers (dentists) that you have previously tagged with the chosen customer tag.
If you wish to change what customers appear in this list, close this window, and add or remove the appropriate tag to/from your customers using Customer menu > Edit.
Click "Next", at the top of the page, to move on.
Step 3
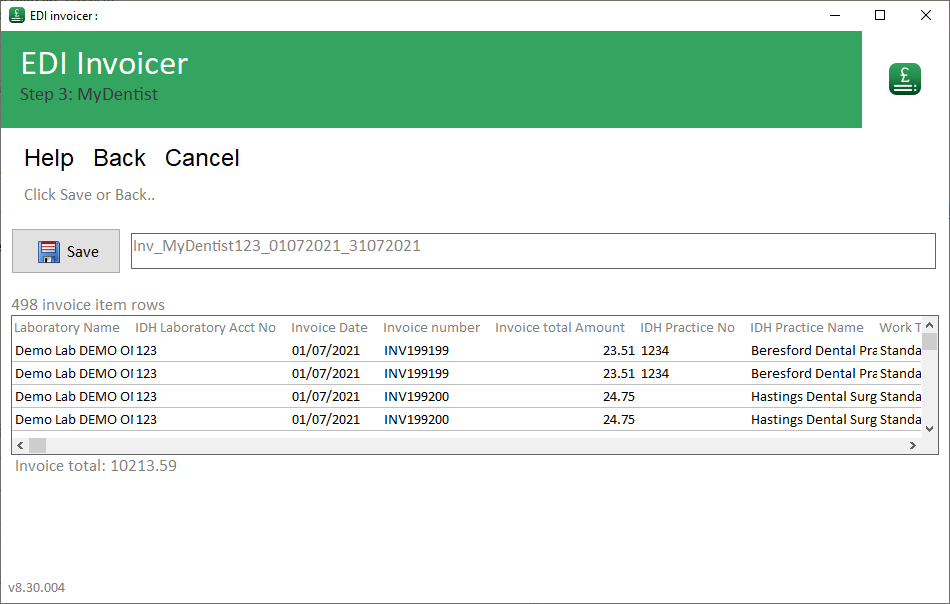
The file is named automatically, but you can adjust this in the box beside the "Save" button.
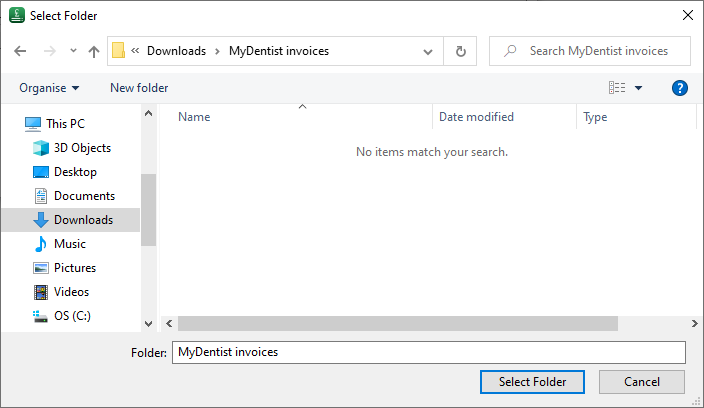
When you're ready, click the "Save" button and choose a location to save the invoice file.
Step 4
Now the file has been saved, we have the choice of emailing it out directly via LabManager, opening it (to view or print it), or to close the EDI Invoicer.
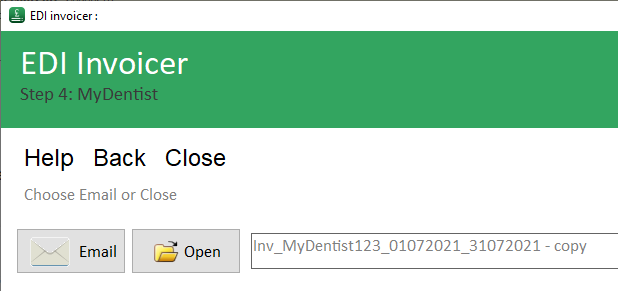
The "Email" and "Open" buttons are only visible after you have saved the file.
Optionally, choose "Open" to open the file with your usual spreadsheet tool.
If you do not have Microsoft Excel, other popular low cost or free applications are Open Office or Libre Office
For this example, we'll email the invoice straight out. So, click the "Email" button.
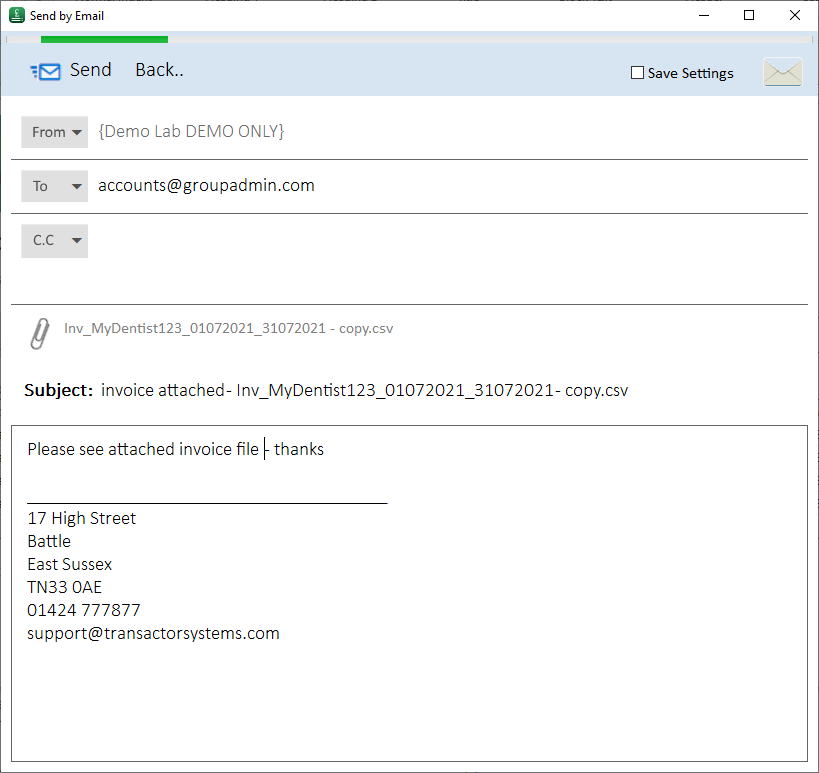
You can click the "TO" or "CC" buttons to pick a customer's email address from a selection list, or just type the recipient's email address into the box.
You may enter multiple addresses separated by semi-colons.
If you are typing email addresses by hand, you don't need to provide a name in curly brackets. {this is optional}.
Click "Save Settings", at the top right, if you want the email addresses and body text to be remembered for your next run.
When you're ready to send, click the "Send" button.
You can close the Invoicer now, or email someone else.
Opening a CSV file in your Spreadsheet application
After choosing "OPEN" you may be faced with your spreadsheet application's options on how it should read the file into your spreadsheet. Typically you can just click "OK" to accept the defaults.
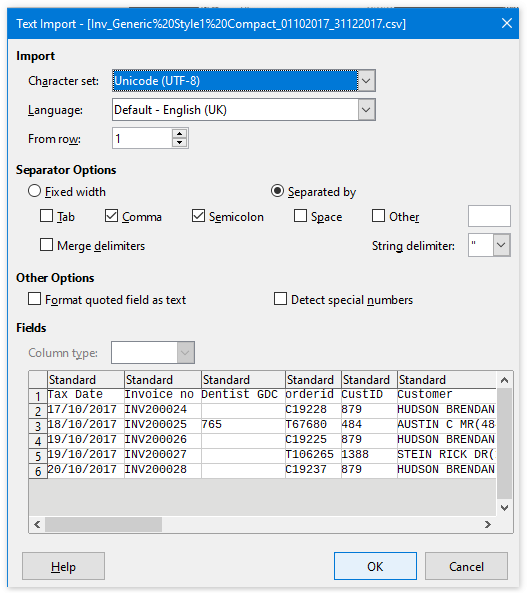
If you get any layout issues, try to open it again and check the "Seperator Options" in your application are set to 'Separated By' Comma and Semicolon (not tabs or spaces).
Once the file is in the spreadsheet application, it should look something like this..

The actual columns will depend on the style format you chose in the EDI Invoicer.
Also See:
Configuring LabManager for IDH/My Dentist Group Invoicing
If you have any trouble using the EDI Invoicer, you're welcome to contact support for assistance.