To start a new job, use the Action Bar and click New Job or use your hotkey (F3).
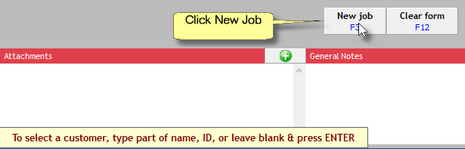
If you are unable to click New Job, that's because there's stuff going on within the Main Form that Transactor needs you to deal with first. Try clicking Clear Form or finish what you are working on first.
The Main Form is ready with your blank new job..
The patient, shade and notation prompts are customisable and explained in the User Guide's New Job topic. This can be useful if you want new jobs to also prompt for a patient DOB or any other information.
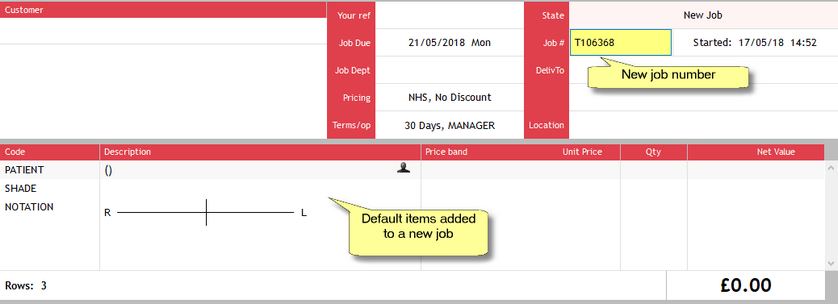
The job number has been automatically assigned by Transactor.
To use your own job numbers instead, just enter the job number you require on the blank Main Form and press RETURN before you choose Action New Job.
Assign a Dentist to the job
Type 'beresford' into the Customer box and press Return.
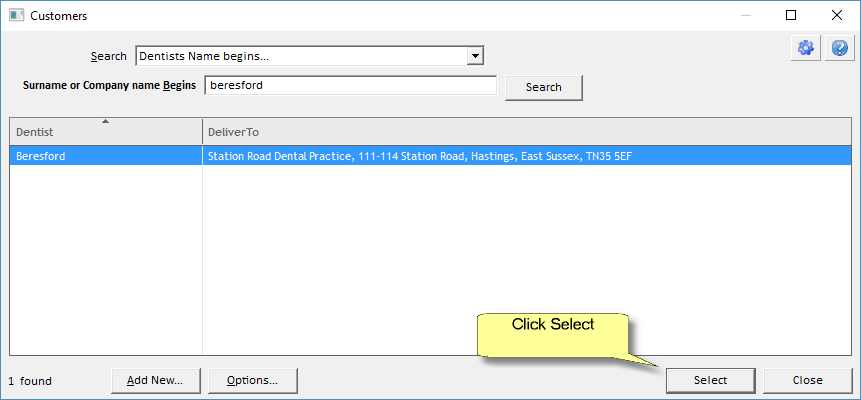
Mr Beresford is already the highlighted customer so just click Select.

You could also search for a customer using just part of their name, or instantly retrieve a customer using the Customer's ID no. These are explained in the User Guide.
Great! Now we have a customer on the Main Form...
It doesn't matter if you have selected a different customer to our example, but if you decide you want to start over just chose Delete Job from the Action Bar.
Notice how the customer's invoice address is on the left of the Main Form, and the delivery address (usually a practice) is on the right.
We'll now fill out this job with some job specific items.
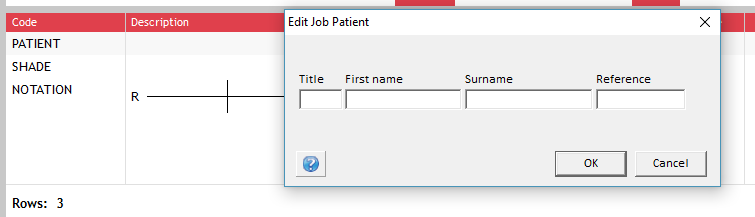
Use the TAB key to move the yellow prompt down to PATIENT, then press RETURN or double click on the PATIENT row.

From the box that appears you can enter the patient details - enter any name you like for now and click OK.
Using TAB or by clicking and pressing RETURN, use the same method to enter a shade and notation. You can make it up, or leave them blank and skip to the next line.
That's the basic contents of a job. We could also have set a department by tabbing to the Job Dept box and pressing RETURN and you could also set your own reference code by using the "Your ref" box. You're welcome to try setting these now.
Tab down to (or click) the first empty row below notation and press RETURN.

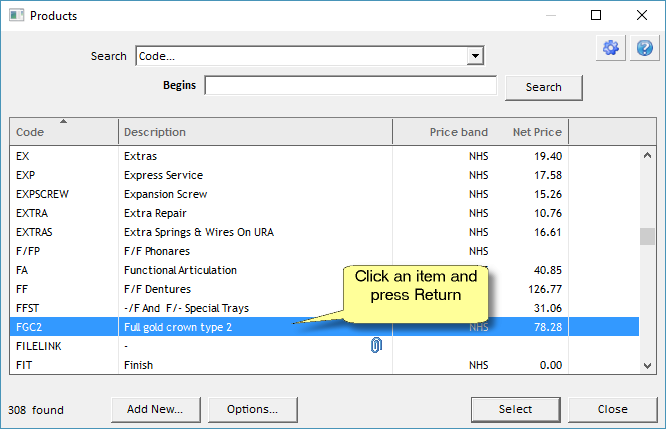
In the Products selector window, click any item and press RETURN
You can add other items to this list by pressing Add New or by using the Control Centre but we'll cover that later.
Select the quantity required and check the Band and Net Unit Price.
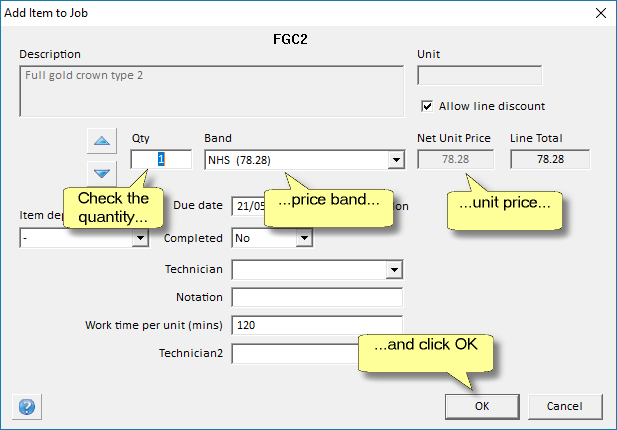
Mr Beresford has already been defined as usually using the NHS price band but you can override this here - or enter a custom price.
The other entry items are optional.
Click OK when you're finished and the item will be added to the job.

Let's try another useful (and quicker) method for adding another item to the job:
Click the next empty row on the job but don't press return. We want to add a 'Porcelain Inlay' by typing its code 'pi', so go ahead and start typing part of the code directly onto the empty line of the job, then press RETURN. You'll see the Products selector appears with all possible matches.
Didn't find what you were looking for in the list? Check the list is searching for Code rather than Description by clicking on the "Search..." box and changing the search method. Every item has a code so if you know the code, it will be much quicker to add it this way.
Before we finish on this subject, we want to tell you about the speed entry method.
Using Transactor's Speed Entry
If you know the item code you can type it in with a comma (and optional quantity) and just press RETURN. That's it! Read more in the More Features topic.
Usual Price Band
Line items you add to a job will inherit (start off with) the price band indicated in the Pricing box shown at the top of the job. This defaults to this customer's 'favourite price band'.
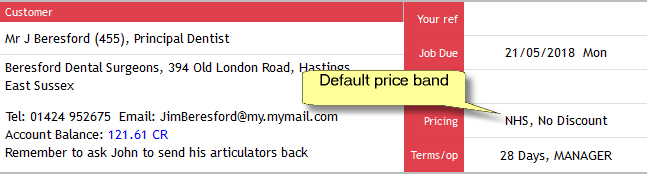
To override the default price band, click in the Pricing box and press RETURN.
Read more on the default Price Band in More Features
Enter Line Notes to include on the Invoice
You can add line notes into the job area which will appear on the delivery note and final invoice.
This is different to the 'General Notes' area which do not appear on the delivery note or final invoice, but will appear on a job ticket.
To add a line note enter a dot as the product code.
On a new line, click in the Code column and type '.' (a full stop) and press RETURN, then press RETURN again in the next window.
Enter General Notes
At the bottom of the screen you'll find a section called General Notes, as discussed in the previous topic. Click the plus icon on the right to add your note.
Feel free to add other Items to this job and then progress on to the next step of the tutorial.