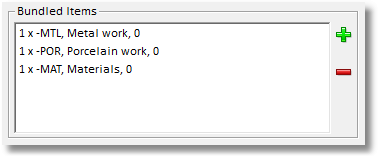
Product 'bundle' codes can be configured so that we can break it down into several trackable parts and assign these to technicians, teams or departments.
Putting the one 'main' product code on to a job will thus cause several sub-items to appear.
Values can be assigned to either the main 'bundle' code, or to the sub-items.
Code |
Description |
Tech team\Dept |
Nominal |
|
Qty |
Value |
PBC |
Porcelain Bonded Crown |
|
CrownAndBridge |
|
2 |
|
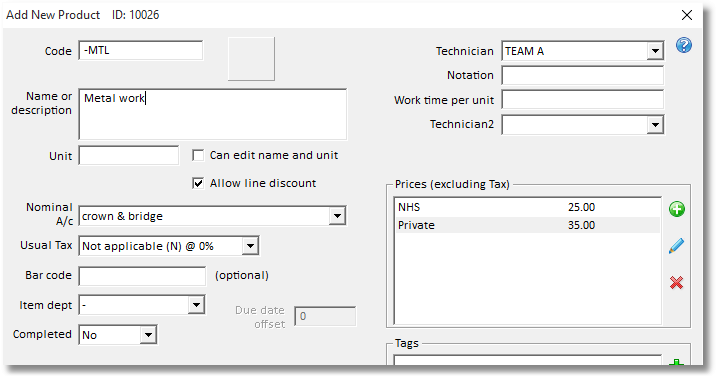
-MTL |
metal work |
team A |
CrownAndBridge |
|
2 |
50.00 |
-POR |
porcelain |
team B |
CrownAndBridge |
|
2 |
80.00 |
-MAT |
materials |
|
Materials C&B |
|
2 |
15.60 |
Optional fields such as Job due date, and Work Time Units have been omitted for simplicity.
Invoices or Statements to the Customer(dentist or Direct Patient) need not show the sub-items, but of course some reports will.
Sub-items can be stages, tasks or materials. We've chosen to precede sub-items with a hyphen so that they all stick together in the Product Selection list..
Let's get straight into it..
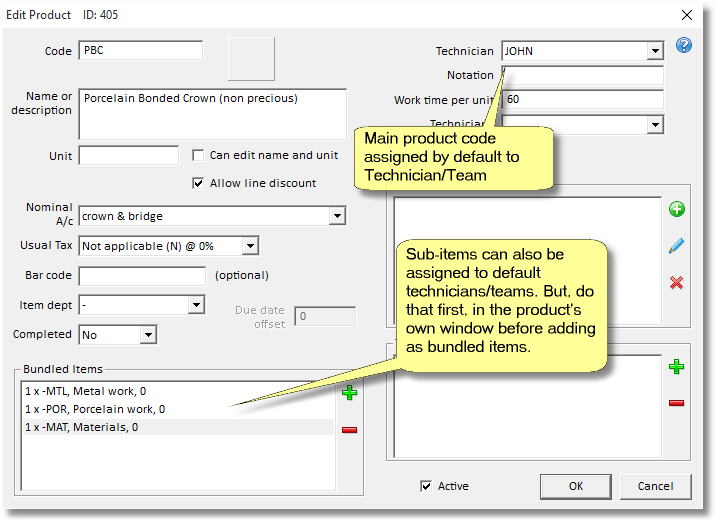
If you haven't already done so enter the Main code and the Sub-item codes. Our example uses those from above..
POR
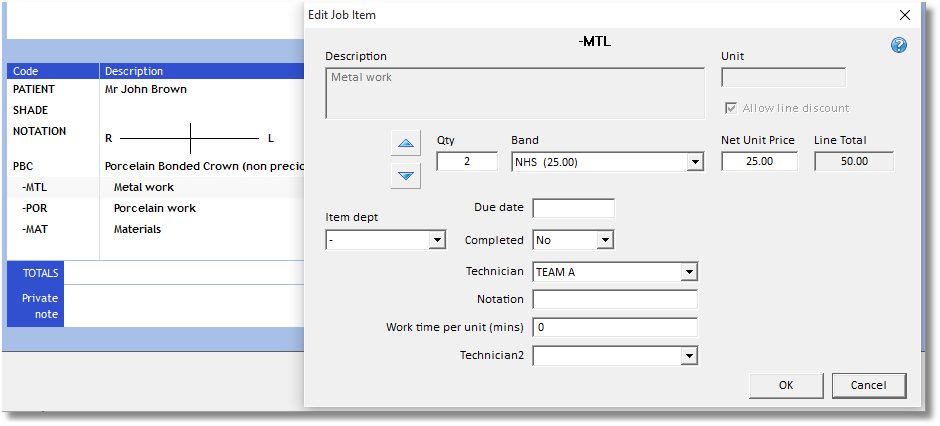
The window above shows the properties of the sub-item -MTL. Guidance is given below for some of the less-obvious settings.
Technician:
This is the default (aka Usual) technician/team. Leave it blank if this tends to change on booking in.
Completed:
Set this to Yes if your lab wants to avoid the complication of having to separately mark each job item as completed before the job is booked out.
Work time per unit(mins):
If you know roughly the average minutes each qty 1 of this item will take, enter it here. Some reports show this.
Prices:
If you have decided not to assign a value to the Main code in your bundle products, then assign prices to the sub-items for each price band.
Bundled Items:
Leave this blank because this item is going to be a bundled item of another product code
Tags:
Leave blank. Tags provide access to advanced features we don't need right now.
Example: add sub-items to a main code
| • | Find the main code 'PBC' in the product selector, choose Options > Edit Properties. |
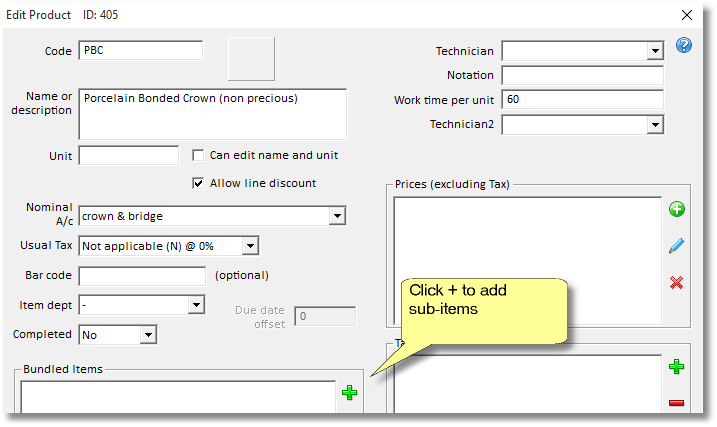
| • | In the Bundled Items group, click the Green + to add sub-items. |
| • | Choose the first Sub-item for this bundle |
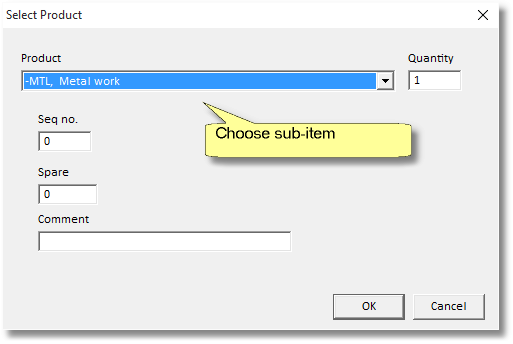
| • | Set the quantity. This is the quantity required for each qty 1 of the Main code. |
Leave the other boxes blank. If you have a preferred ordering for the sub-items, enter a Sequence Number in the Seq no box eg 5, 10, 15 this will give you room to add another sub-item later on and slot it in with the correct order.
| • | Continue adding the other sub-items.. |
In this version you can't re-edit these sub-items, but you can delete them and re-enter them.
Just one more thing.. about the properties of the Bundled Items..
Click Ok then return to the Main Form.
Ok, we're ready to put this bundle product to use on a real job.
Example: Entering Bundle products onto the Main Form
| • | On the Main Form, chose the code 'PBC' and press ENTER |
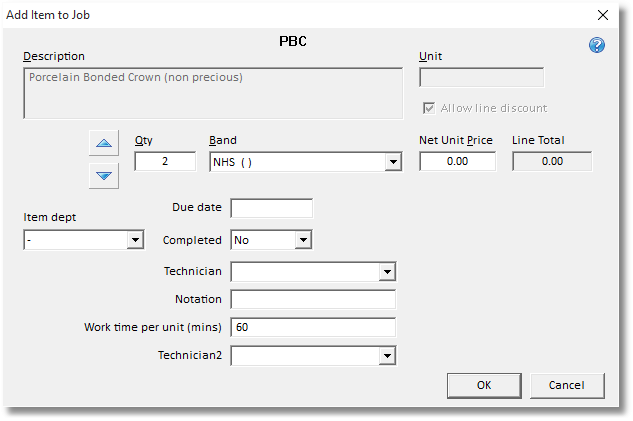
| • | In the Add Item to Job window, set the qty and confirm the Band and press ENTER |
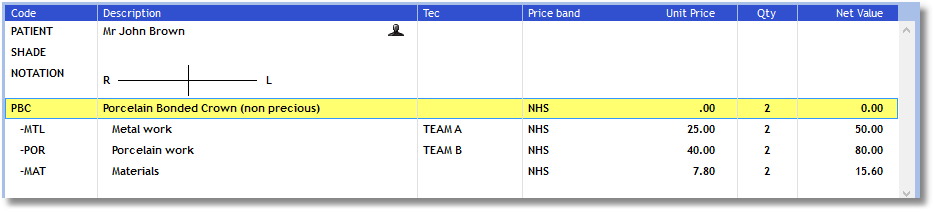
Now we get to see the benefit of having setup 'default' technician/teams. The work has automatically been assigned.
In our example we're using Team A and B but these could of course be technician names, technician initials, or a whole team name like 'Metal Team'. It's up to the Lab administrator to plan how they want to assign work and what level of breakdown is needed for the technician output reports.
Can't see the Technician (Tec) column or any of the sub-items on your Main Form?
| • | Right click the Main Form, choose Display Format.. |

Sometimes, technicians are off duty, or you need to swap teams around, or you want to change the price..
Example: Changing assigned technician/teams
| • | Click on one of the sub-item rows and press SPACE (a double click works too) |
| • | Change what you need to and press ENTER |
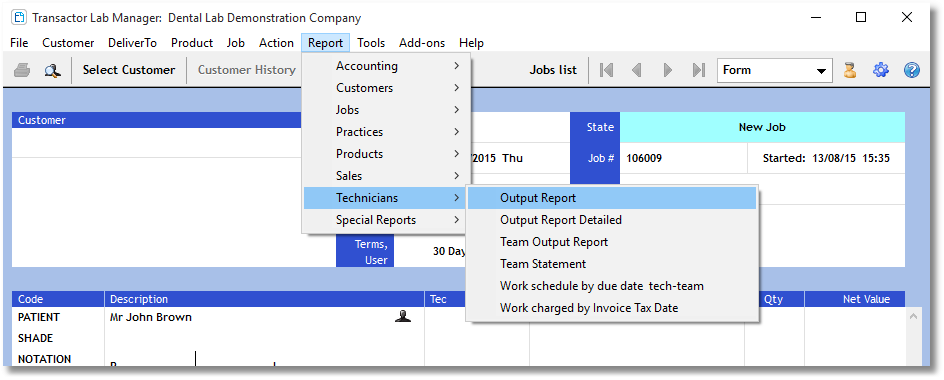
Technicians Output Report
Periodically you will need to report on the technician work output.
| • | From the Report menu, choose Technicians > Output Report.. |
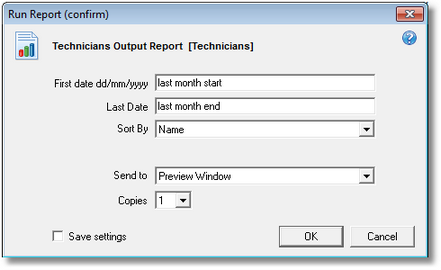
Enter the date period. You may use dates like 31/7/2015 or words such as 'Today', 'Last month end'.
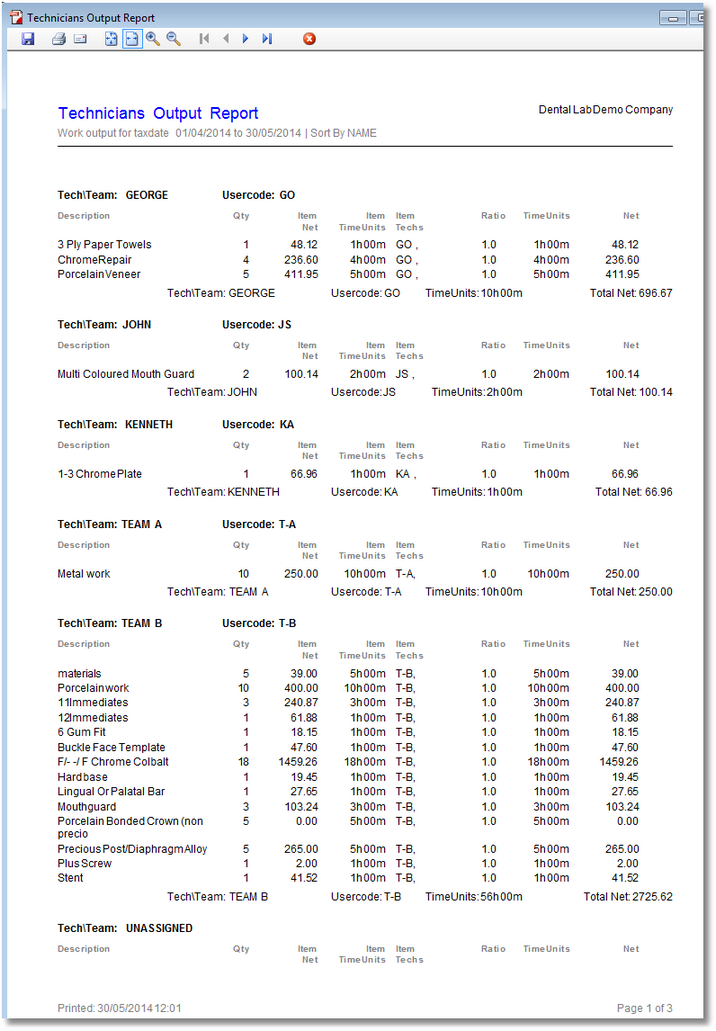
The last section of this report contains the summary.

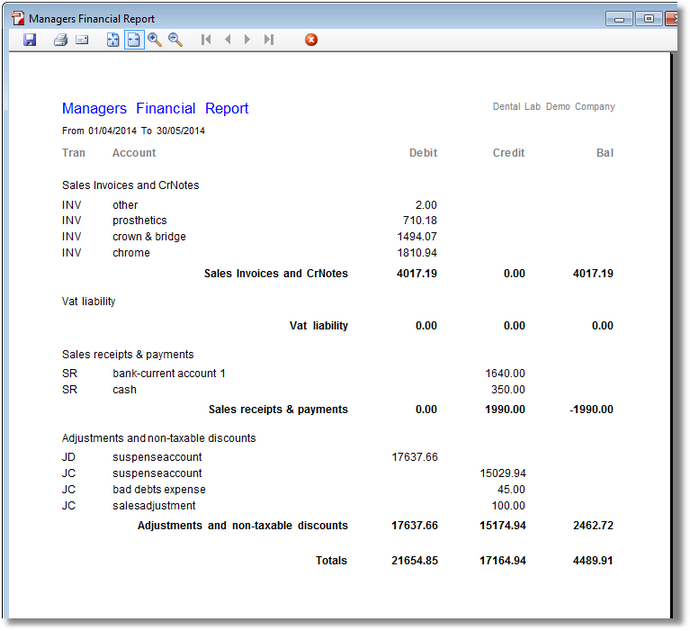
Managers Financial Report
These other reports are based on the Nominal Account or accounting Department. This report would be ideal to hand over to your Book-keeper /Accountants for each month of business.
| • | From the Report menu, choose Accounting > Managers Financial Report |
Notice that the 'Sales Invoices and CrNotes' totals should correlate with the Technicians Output Report.
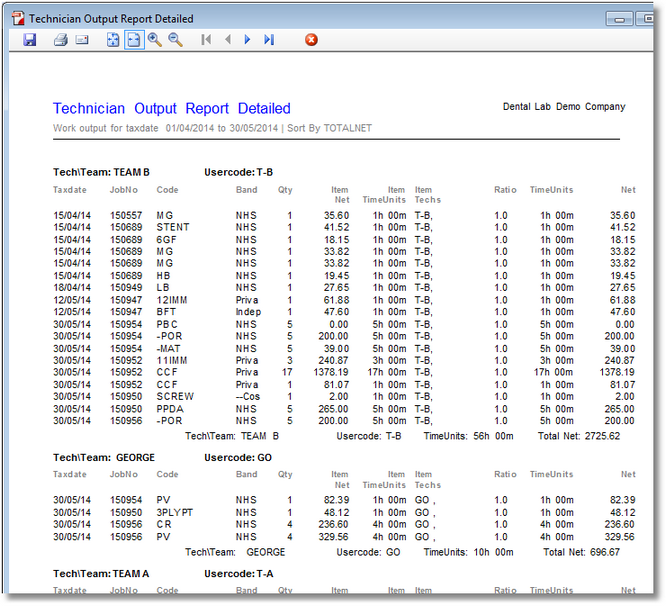
Technicians Output Report Detailed
This is a detailed version of the Technicians Output Report.
| • | From the Report menu, choose Technicians > Output Report Detailed |
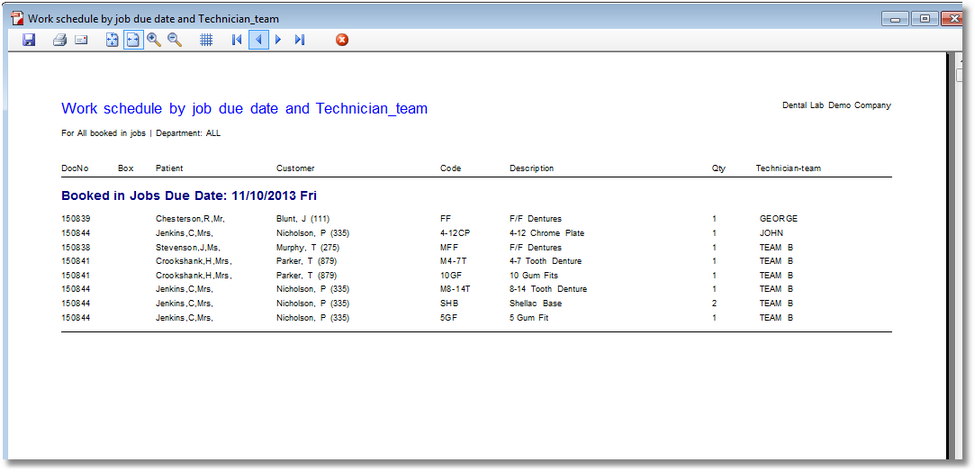
Work schedule by job due date and Technician-team
| • | From the Report menu, choose Technicians > Work schedule by job due date and technician-team.. |
Choose Due Date or leave as 'All booked in jobs'..
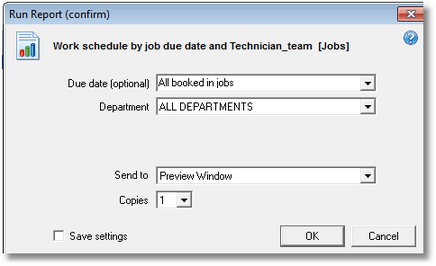
Work for each Job Due Date is on a fresh page in the report.