How to get here
Tools menu > Control Centre > Setup Wizard > New Jobs.
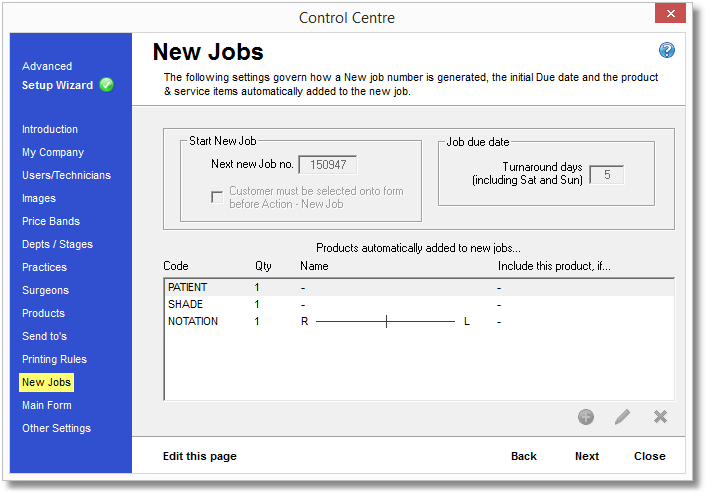
From this page you can customise some of the default data associated with a new job, such as how it should be numbered, how far ahead should the due date be, and which sales and note items should be included as standard.
The settings on this page will affect any new jobs you create.
When you first reach this page, the controls are locked from editing and the text is 'greyed out'. Before you can make any changes to these controls you will need to click the "Edit this page" button at the bottom of the page by clicking in it. This is to protect these controls from any accidental changes.
Start New Job - Next new Job no.
The "Next new Job no." box shows the number Transactor will give to the next new job that's created. You can change this to another number - as long as that number's not already in use - and Transactor will start counting on from that number for new jobs.
Job Due Date - Turnaround days
The Due Date represents the date at which you aim to get that job out of the lab and delivered to the customer. When creating a new job, the Due Date for the job is shown at the top middle of the page. By default, this may be a week from the date the job comes into the lab but you can change this default behaviour to be any number of days you prefer by altering the number in the box.
Weekends are included in the calculation, so a job that is entered onto the system on a Monday, with 7 turnaround days, will be due the following Monday.
Products automatically added to new jobs...
The items listed in the main box on this form are automatically included on any new jobs you create. Most labs will always want to associate a Patient name, Shade and Palmer Notation with a job, so Transactor is configured to add these by default. You can, of course, remove these or add other items to the list.
For an item to be made available for adding to the list it must first be created within the Products page of the Setup Wizard, as either a Priced Item or Note Item.
 Add New Default Item
Clicking this icon will allow you to add one of your pre-configured Products as a default item for new jobs.
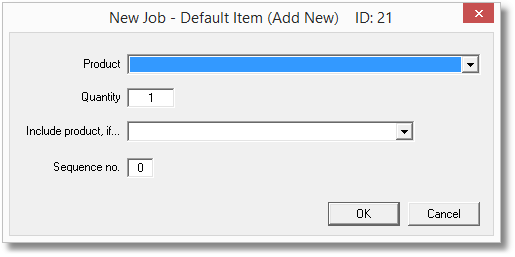
Select the Product or Note Item you want to add as a default line item, from the "Product" list at the top of this form.
Select the Quantity of this item that should be added. Note, this is the quantity of the item as it appears in the "Qty" column on the main form, not the number of times this product/note item is repeated on the new job form.
You can restrict when this item appears on a new job by altering the "Include product, if..." box, such that this item will only be included if the customer has a particular tag. Tags are listed by their ID number.
You can configure available tags from the Tags page of the Control Centre.
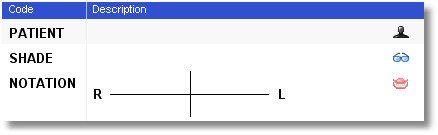
Your default items will be added to the new job in the order specified by the "Sequence No.", with the items with the lowest Sequence No. appearing first and the next highest number following, and so on. For example, consider the following default items:
Code |
Sequence No. |
SHADE |
3 |
NOTATION |
6 |
PATIENT |
1 |
The above items will appear as shown below when creating a new job, as PATIENT has the lowest Sequence No, SHADE is second highest and NOTATION is third.
Select the default item in the list that you wish to edit, then click the pencil icon. You will be presented with the same form as for Add New Default Item (above), except it will contain the details of the item you selected.
Make any alterations then click the OK button to save the changes, or Cancel to discard them.
Select the default item in the list that you wish to remove, then click the red cross icon - you will be asked to confirm your action. This will remove the item from the list of Default Items, but the actual Product or Note product is still available for use within Transactor, unless you also delete it from your available Products.