How to get here
Tools menu > Control Centre > Setup Wizard > Products.
From this page you can enter the details of the products and services you supply. Note that you can order this list by Code or Description by clicking the relevant column header.
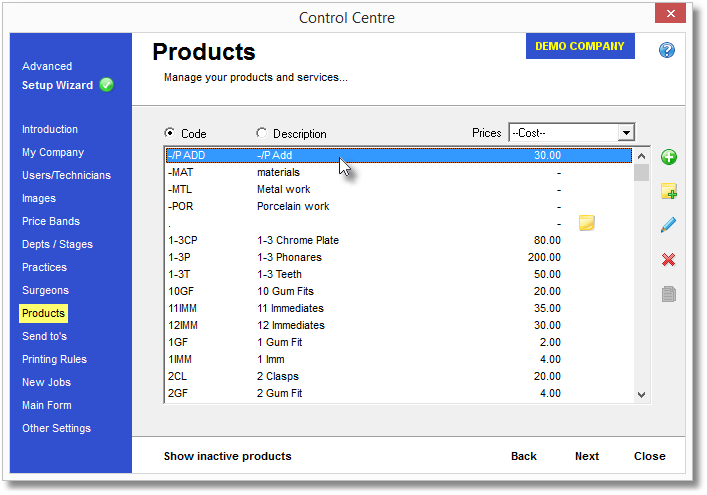
Select the price band you wish to view using the Prices box at the top right of the list.
![]() Add a new Product
Add a new Product
Using the icon strip to the right of the list box click the white plus symbol in the green bubble. You can also add a new Product from the main form by using the Product menu, then selecting "Select or Add New..." and clicking the "Add New" button on that form.
View this help page for full details on adding a sales item: Add a new Product.
![]() Add a new Note Item
Add a new Note Item
A Note Item is similar to a normal Product except it is used solely as a memo or note - there is no price attached to it. For example, the Palmer Notation cross-hair used on new jobs is a Note Item, as are the lines for Patient Name and Shade.
You can add a new Note Item from this page, but you can also do it using the "Add New" button on the Products dialog (Product menu, Select or Add New...) Please see the help page for Adding a new Note Item for more details.
![]() Edit a Product or Note Item
Edit a Product or Note Item
Using the icon strip to the right of the list box click the pencil icon. The form will appear containing the details of the selected product or note item, from here you can make any necessary changes. You can also edit a product using the Product menu, "Select or Add New..." and then right clicking on the item you wish to edit and choosing "Edit Properties".
Refer to the pages for Adding a new Product or Adding a new Note Item for full details on all the boxes on this page.
![]() Delete a Product
Delete a Product
You can mark a product as inactive to prevent it from being available for new jobs. A product cannot be deleted permanently, only marked inactive in this way - this is to protect any existing jobs that may refer to the obsolete product.
You can mark an item as inactive by selecting the product in the list and then clicking the red cross icon on the icon bar. Alternatively you can edit a Product's properties (see above) and clear the tick mark next to "Is Active".
![]() Copy a Product to a New Product
Copy a Product to a New Product
--- Note, this facility will be enabled in a future release, and is not currently available ---
![]()
Show Inactive Products
To swap between viewing active or inactive products, click the "Show inactive products" button at the bottom of the page. To change back to viewing active products, click the "Show active products button".
Inactive products are not available for use on new jobs, although old jobs that included any inactive products will still contain those products.