This topic will explain how to add a new Surgeon.
If you want to start adding your own data to the database. First see Clear the demo data and start from fresh
Add a Surgeon and choose a Dental Practice
Click this image to view a video of this topic:

For this example we'll add a Surgeon directly from the Main Form.
If you're planning on adding all your surgeons and/or practices, you'll find it quicker to use the Setup Wizard's Practices or Surgeons. (see Setup Transactor Lab Manager for your lab).
We'll assume here that the new Customer is a 'Surgeon' type.
| • | From the Customer menu, choose 'Select or Add New' |
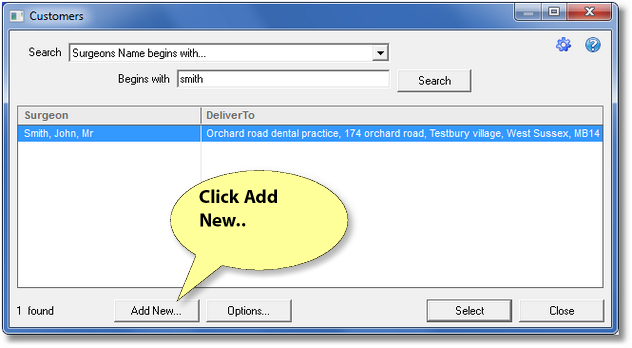
Notice existing Surgeons are listed.
Choose 'Add New', and start to enter the Surgeon's name..
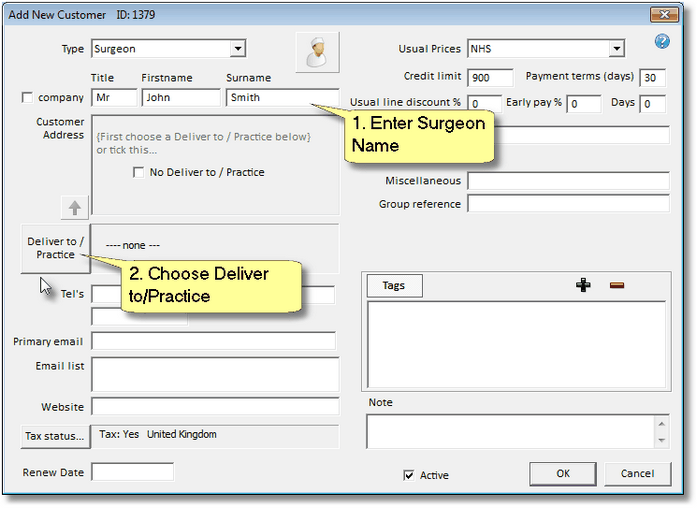
Our example Customer Type is Surgeon, and so Transactor Lab Manager prompts us to Choose a Practice first.
| • | Click 'Deliver to / Practice' and choose a Dental Practice |
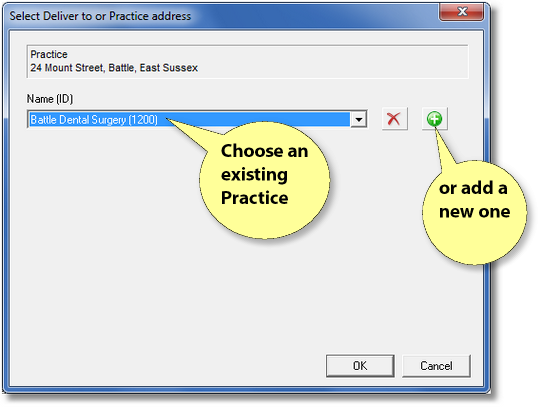
If the Practice isn't already in Transactor Lab Manager, you can add it now.
| • | Click Ok |
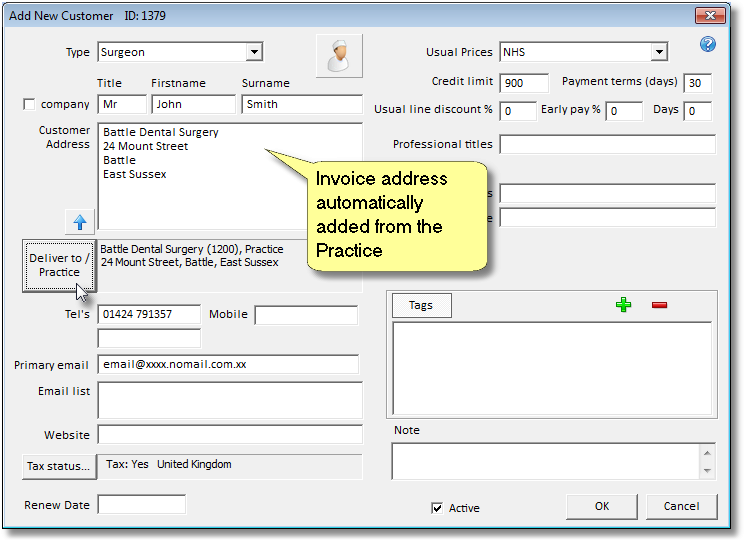
You'll be asked if you want to go ahead and copy the address to the Customer's Invoice address.
| • | Click Ok again |
| • | Now enter the rest of the details, and finally click OK. |
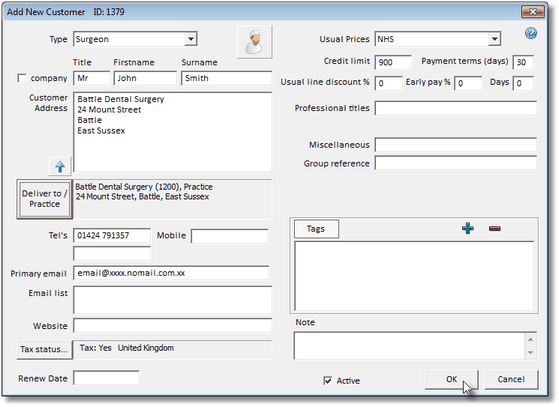
There's advanced stuff we've left out, the Tags for example. Tags are a powerful feature which allow a lab manager to assign user defined properties to implement business rules specific to this customer. One such Tag that's already there to choose if needed, is 'Do not print patient name on invoice or statement'. Another Tag might be assigned to indicate that this customer is one of several others in a group, who require a certain type of Summary Invoice or statement. Tags can be used in the Report selection filters to make it easy to produce the ideal documentation for each group of surgeons. New tags can be created in the Control Centre (Tools > Control Centre > Advanced > Tags > Customer).
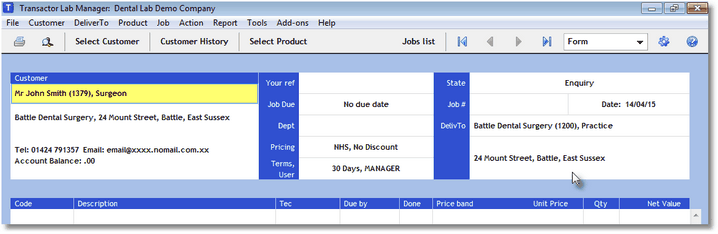
Ok, now we'll look at the Main Form with that customer's account address on the top left, and the delivery address (aka Practice) on the right.
Just for fun let's go back into the Customer record, and change the Customer's icon avatar.
On the Main Form, click the customer's address (or choose Customer - Edit..). Click the Icon to the right of the Customer name and choose another avatar.
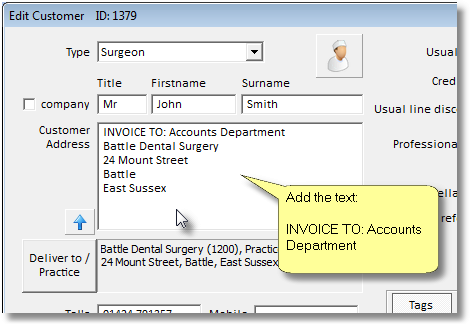
To indicate a different Invoice address
Now we'll indicate a different Invoice address such as that of a Principal Surgeon in the practice.
From the Customer menu, choose 'Select or Add New' and highlight the Surgeon we added earlier and choose Select. On the Main Form, click the customer's address (or choose Customer > Edit..), then ensure the Customer Address is correct for your Invoicing requirements.
In this example we have just inserted the text "INVOICE TO: Accounts Department" to the first row of the Customer Address.